
Four key steps to making killer ribs
When you ask people about a rib recipe, everyone seems to have their favorite way of making them. Yet each time I’ve tried someone’s recipe, I’ve been disappointed. Too fatty. Too tough. Too bland. But after much trial and error, I have finally found rib nirvana! Here’s four key steps I’ve found are critical to cooking amazing killer ribs:
1. Choose the right cut
When I crave ribs, I usually go to the store that day and see what’s available. Sometimes that means grabbing a package of pork side ribs. Usually this cut is cheaper than others and a great deal for some who prefer more fattier ribs. But I’ve finally figured out that, for me, side ribs always disappoint because I hate fatty meat! I much prefer the more lean “baby” back rib cut. Hey, I’m not dissing side ribs – either cut is fine and everyone has their preference. All I’m saying is consider what kind of ribs you prefer when picking your cut.
2. Seal in some flavour
Now I know some people swear by boiling their ribs before throwing them in the oven or on the grill. But I’ve found doing this takes the flavour right out of them. Hey, if you’re trying to reduce the fat, then just buy the back rib cut instead! I think the best results come from baking your ribs in the oven first. When doing so, it’s important to make sure you do the following to seal in the best flavour:
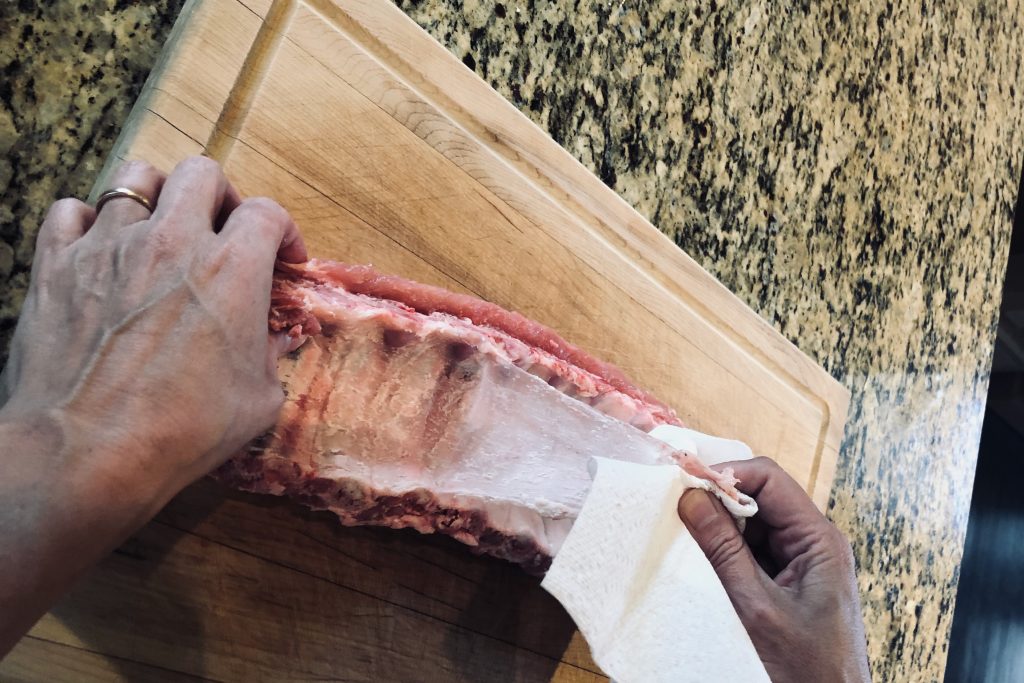
Remove the membrane
I am always surprised how many home cooks – and restaurants (!) – serve up rib racks without removing this. Sure, it’s not the end of the world, but if you don’t take the membrane off, you’re leaving a flavour barrier between your ribs and your rub.
Rub your ribs!
You can make your own rib rub with seasonings you probably already have in your pantry. Here’s some yummy recipes I’ve tried:
You can also find some great prepared dry rubs. Whatever you do, don’t skip this step and give your ribs some love! Rub the spices in and allow some time for them to rest and soak up the flavour for a tastier, more tender meat.
3. Wrap in tinfoil
For me, this step is the game changer. Previously, I used to put my ribs on a rack in a roasting pan with a little water in the bottom and then cover the pan with tinfoil to bake and steam. The results were okay, but not always consistent. Now, by wrapping them in tinfoil, I always get ribs that are crispy on the outside and falling off the bone, without a lot of fat.

Take your rib rack, cut it in half or thirds and wrap two sections side by side in tinfoil lengths about 24″ x 12″. (I double wrap them to make sure they are sealed well). Then refrigerate them – the longer you do, the better the flavour of your meat will be. Don’t worry, if you don’t have time, then you can still cook them right away. But if you do have time to put them in the fridge, make sure they sit at room temperature for at least 15 minutes before you cook them. Preheat your oven to 325 ℉ and then bake the ribs in the tinfoil for 2 1/2- 3 hours.
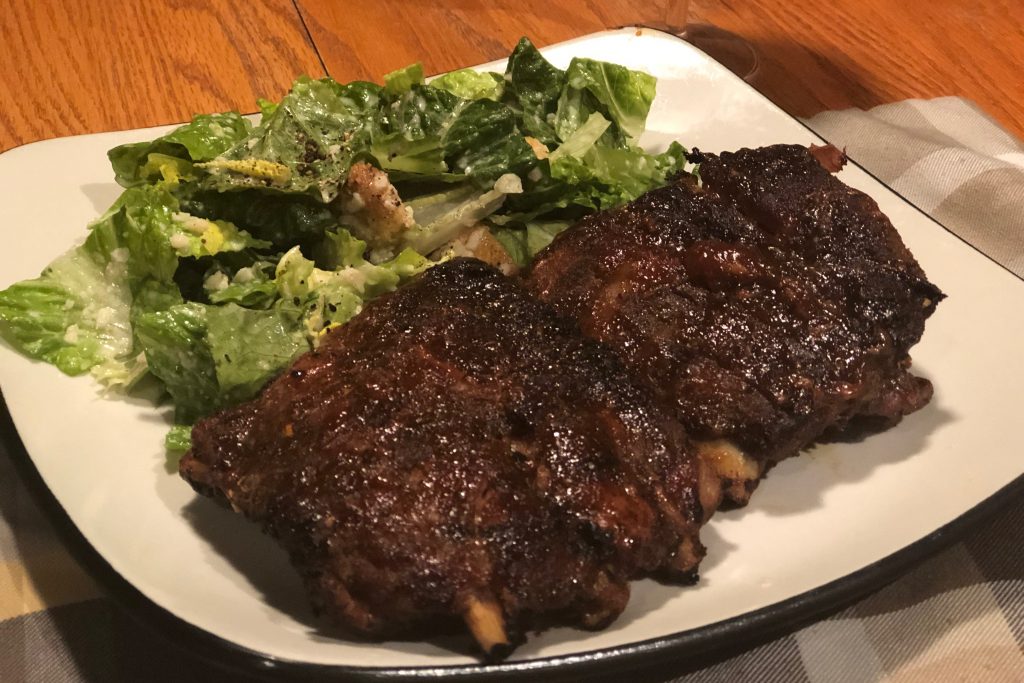
4. Slather on the sauce
Yes, you could eat the ribs as is with just the rub on. But then you truly miss out on the lip-smacking finger-licking experience that comes with a good coating of barbecue sauce! Everyone has their own favorite sauce – I know my girlfriend swears by Kraft original barbecue sauce. That’s very good, but if I have time, I make my own special sauce to use – check it out!
Once your ribs are baked, remove them from the tinfoil packets and lay them out on a rack on a cooking sheet. Baste both sides of the rib racks with sauce. Cook again on a grill or oven at 350 ℉ for 5 minutes on one side. Flip ribs over and cook for another 5 minutes. Slather on some more barbecue sauce, and bake for 5 minutes again on each side. I promise you, following these steps your ribs will be rave-worthy! Enjoy!!